Editing presets already assigned to a preset position
Step 1. Connect to the guitar. More info: Connecting to a guitar
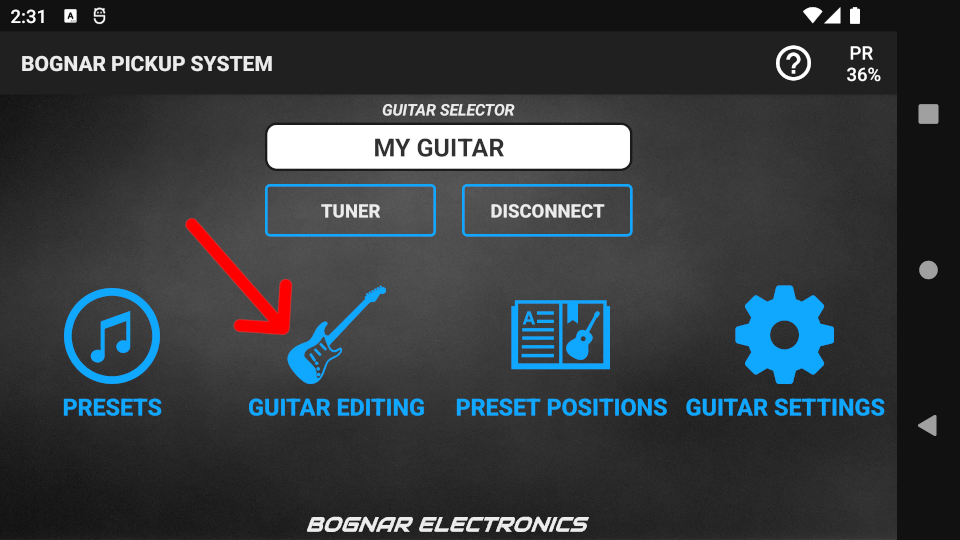
Step 2. After successful connection, press the GUITAR EDITING button to enter GUITAR EDITING. GUITAR EDITING can also be activated by turning the MAIN switch on the guitar to any of the preset bank positions (A-J).
Step 3. Turn the MAIN switch to the “A” position. Every preset position in bank “A” will appear on the screen.
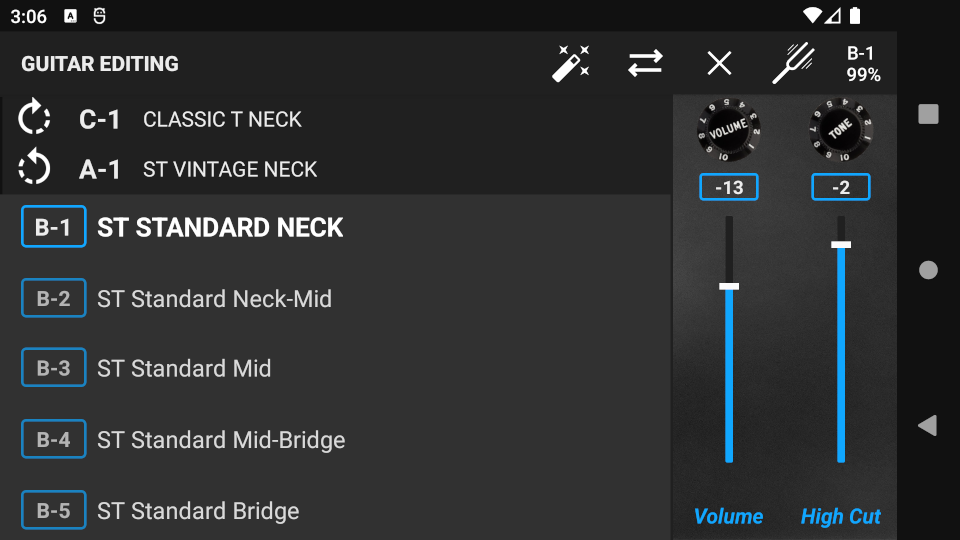
Use the 5-way switch to select the preset position you wish to edit. (e.g. A-4)
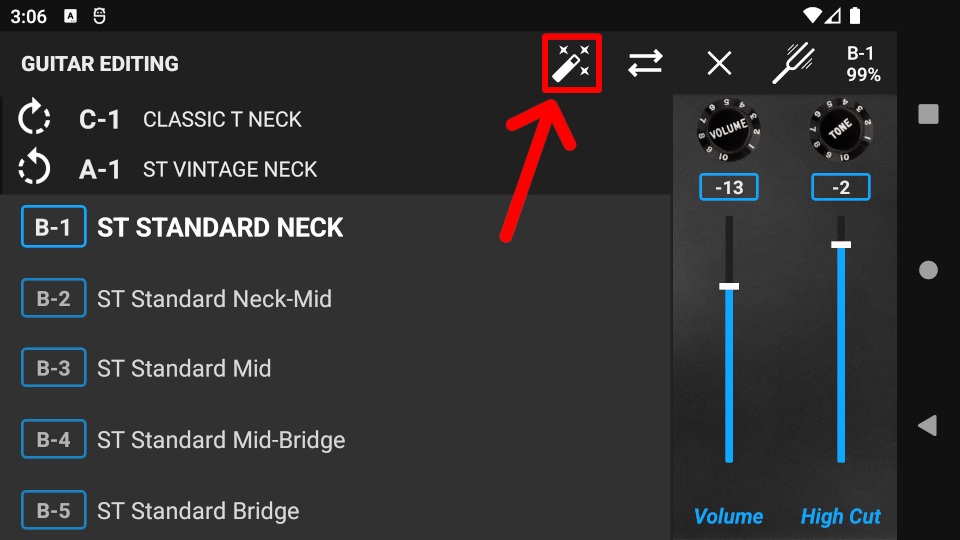
Step 4. Press the “enhance” icon to enter the Preset Edit screen.
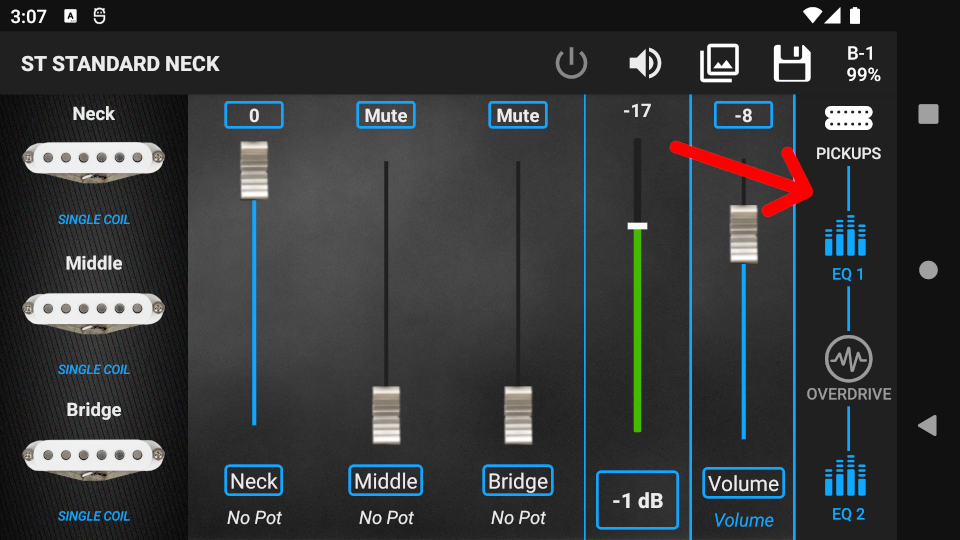
Step 5. The signal chain of the guitar is located on the right side of the screen, with the following components:
- Pickups
- EQ 1
- Overdrive
- EQ 2
Press the component icons to navigate through the signal chain, then adjust the component parameters until you find the right tone. More info: Pickups, Equalizers, Overdrive
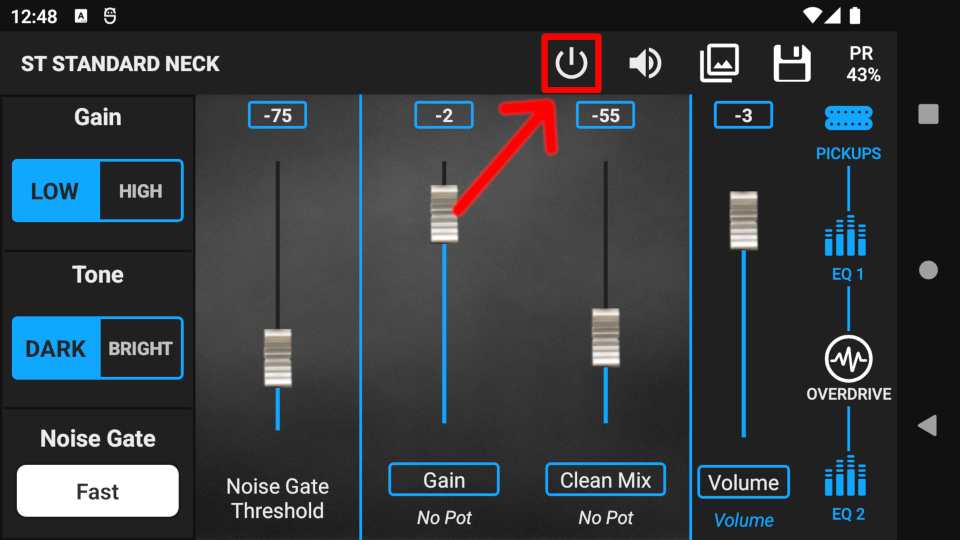
Step 6. Press the switch icon to turn on/off the active component (except Pickups).
Step 7. While editing, you can optionally use the Snapshots tool to find the prefect tone. Using Snapshots helps you to compare different preset settings (tones) quickly and easily. More info: Snapshots
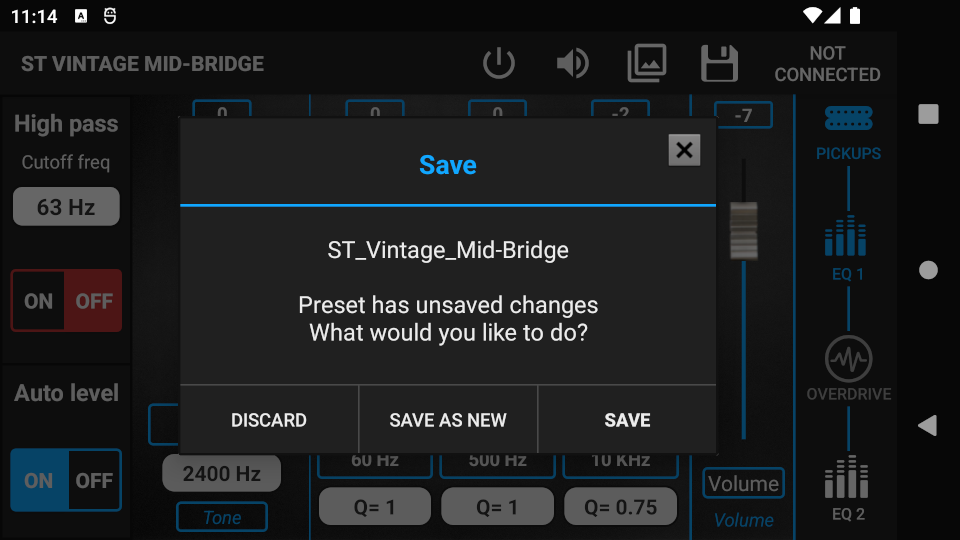
Step 8. Press the save icon to bring up the Save pop-up window. You can save changes either to the current preset, or to a new preset and leave the current preset untouched.

To discard all changes, press the back button on your device, then press the DISCARD button in the Save pop-up window.