Step 1. Start editing a preset. More info: Preset editing (assigned) or Preset editing (unassigned)
Step 2. Press the Overdrive icon on your signal chain to enter the overdrive.
Step 3. Use the switch icon on the Action Bar to turn the overdrive ON.

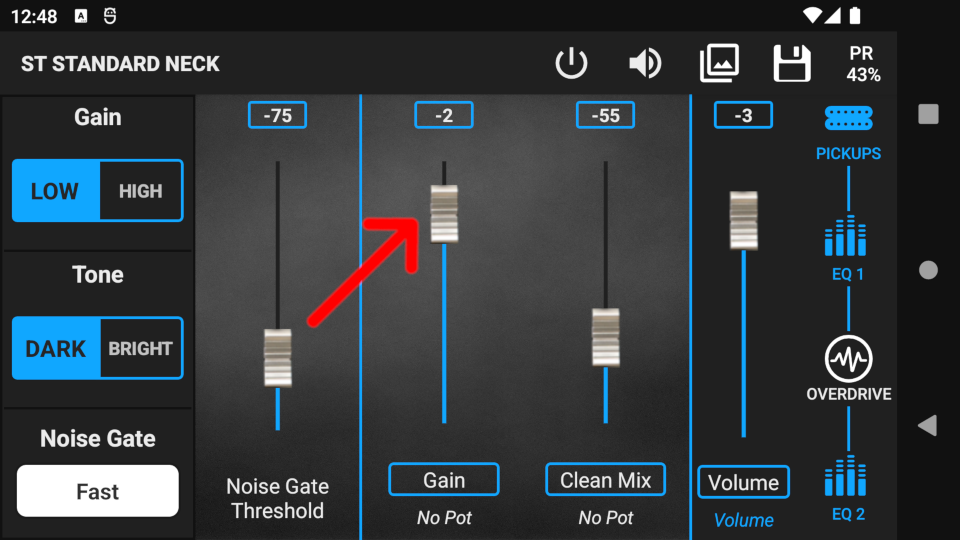
Step 4. Use the Gain fader to set the gain of the overdrive.
Step 5. A potentiometer can be assigned to the fader by pressing the Gain label. The actual value of the fader will be the maximum value of the potentiometer.
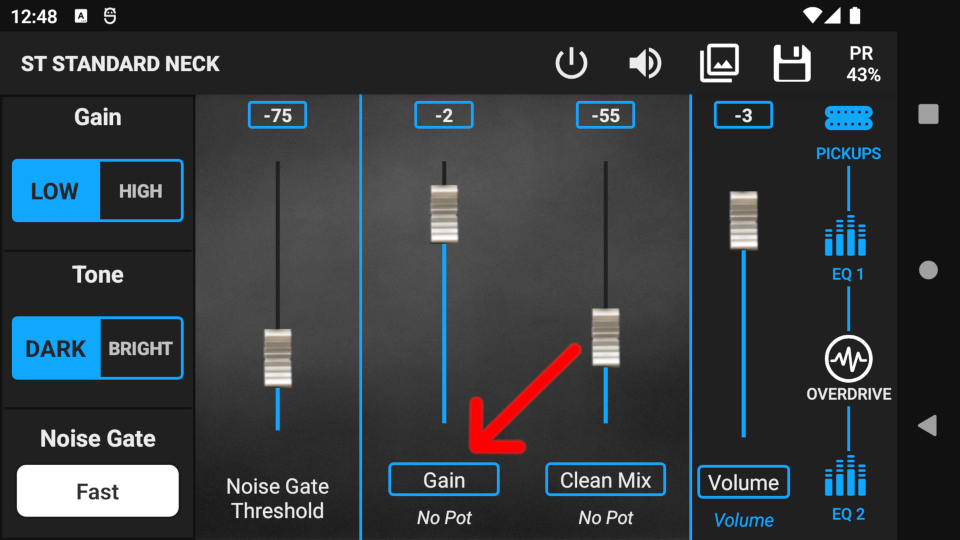
Step 6. For the Gain fader only, the selected potentiometer can be switched to Volume compensation mode. In Volume compensation mode, the volume remains at the same level as the potentiometer (gain) is turned down. Use the switch on the Pot. assign menu to activate this mode (blue = ON).
Warning! Potentiometers are not working in PRESET EDITING, only in GUITAR EDITING.

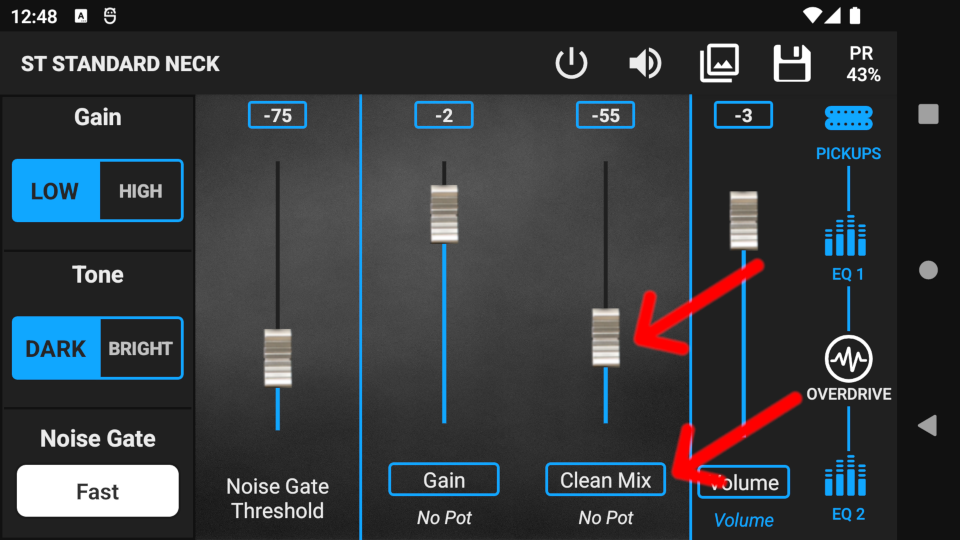
Step 7. Use the Clean Mix fader to mix clean signal with the overdrive signal. For mild overdrive tones, set the Clean Mix fader to maximum (0dB), then move the Gain up until the desired saturation is achieved.
By pressing the Clean Mix label, you can assign a potentiometer. The actual value of the fader will be the maximum value of the potentiometer.
Warning! Potentiometers are not working in PRESET EDITING, only in GUITAR EDITING.
Step 8. Use the Tone and Gain switches on the left side of the screen to set the overdrive’s main tone and gain characteristics. Dark means more mids, and Bright means more highs. Switch to the High Gain setting if you need more gain than the Low Gain setup with +15dB of gain.

Besides the Tone switch, the EQs have a substantial effect on the overdriven sound. Use EQ 1 to set the dominant frequencies on which the overdrive will generate harmonics. Use EQ 2 to fine tune the already-overdriven sound.
More info: Equalizers
Noise Gate
Step 1. Turn on the Noise Gate by pressing the selector under the noise gate label, and set the decay time. Decay time means how fast the noise gate reacts after reaching the threshold. Use higher decay times if you do not want the Noise Gate to mute the signal when playing rests.
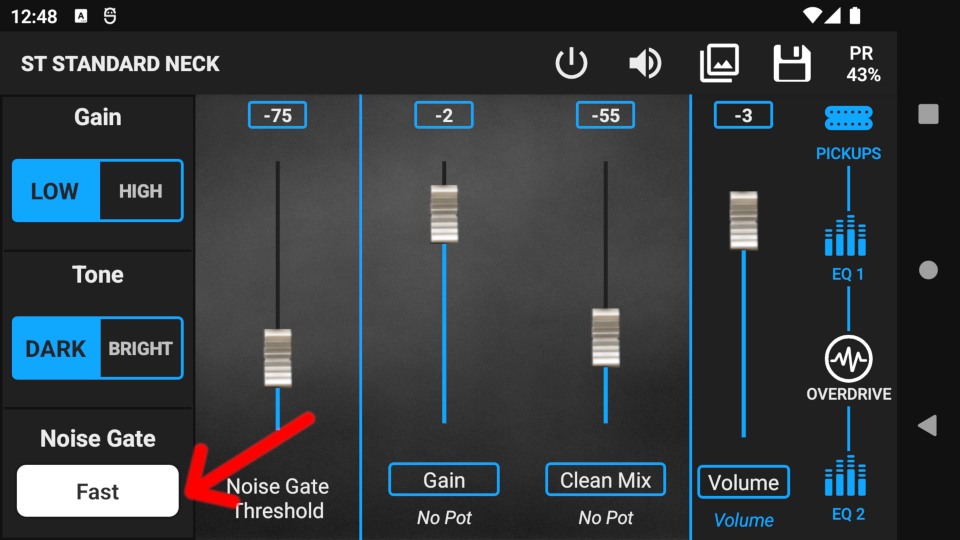
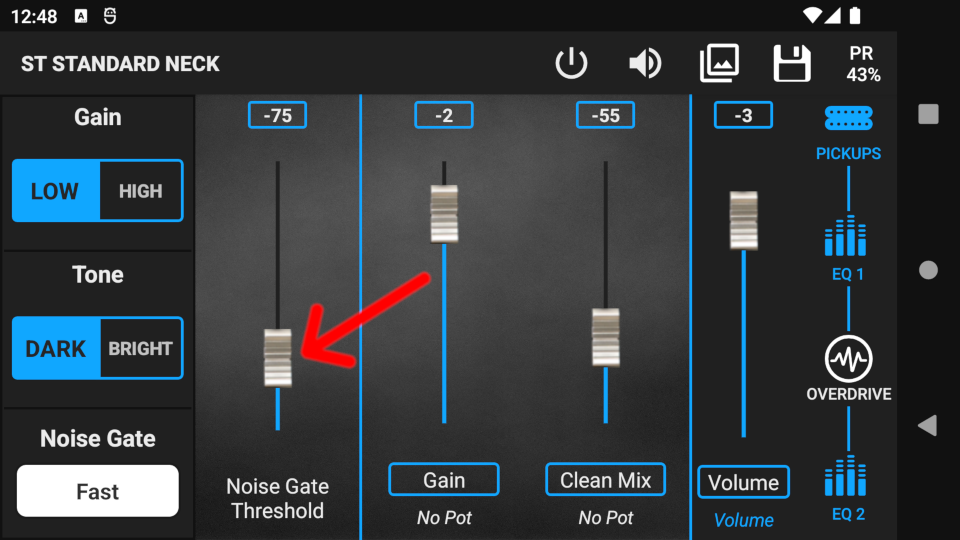
Step 2. Use the fader to set the Noise gate threshold as follows:
- Set the desired gain, tone, and volume.
- Mute the strings on the guitar, then move the fader up until the noise disappears.
Setting the threshold too high will not only cut the noise but also the usable signal. Setting the threshold too low will not cut the noise effectively.
Warning! Always set the Noise gate threshold after the Volume is set. By resetting the Volume level (either in editing, or by moving the Volume) the Noise gate will not work as intended, as the threshold level will be either too high or to low.
You have the option to use the Snapshots tool to find the perfect overdriven tone. Using Snapshots helps you to compare different preset settings quickly and easily. More info: Snapshots
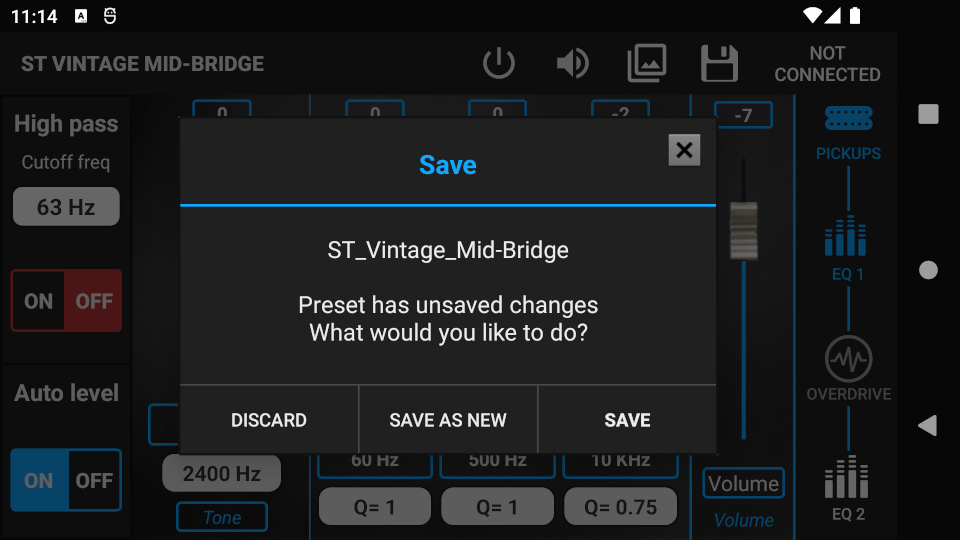
When you are finished with editing, press the Save icon to bring up the Save pop-up window. You can save changes either to the current preset, or to a new preset and leave the current preset untouched.

To discard all changes, press the back button on your device, then press the DISCARD button in the Save pop-up window.