Step 1. Start editing a preset. More info: Preset editing (assigned) or Preset editing (unassigned)
Step 2. Press the Snapshots icon on the Action Bar to bring up the Snapshots menu.
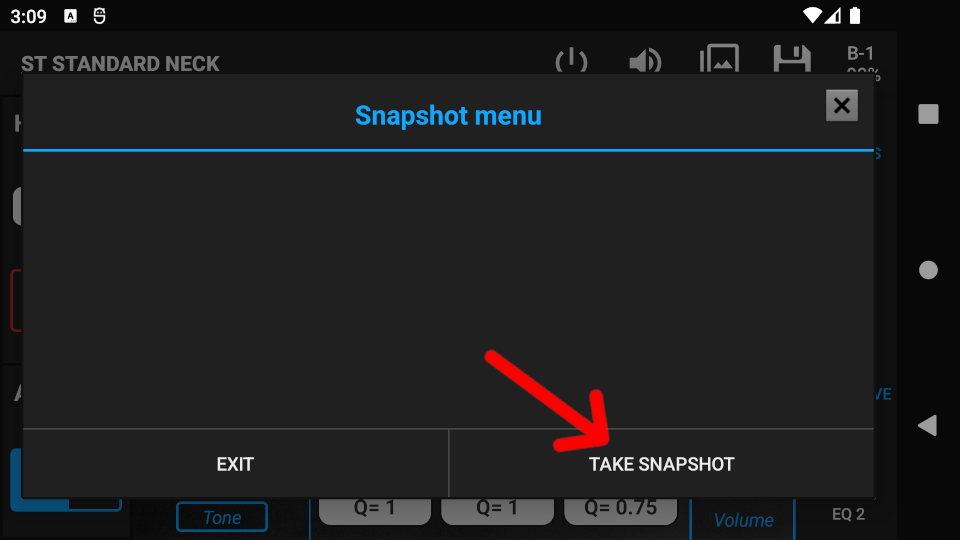
Step 3. Press the Take Snapshot button to create a copy of the existing preset settings. The snapshot will appear in the list.
Step 4. Press Exit, then continue adjusting the preset parameters.
Step 5. Press Snapshots again on the Action Bar and take a new Snapshot.
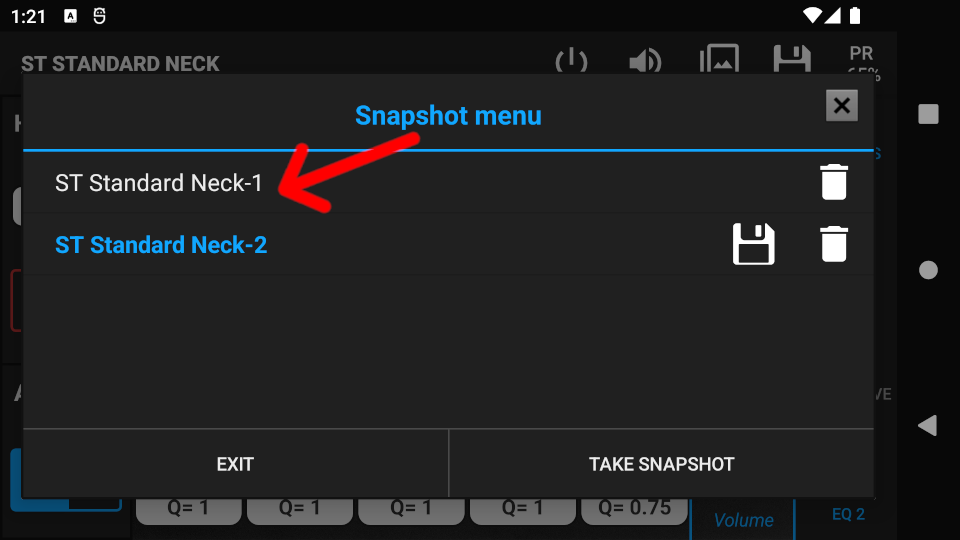
Step 6. Press on the name of the first Snapshot to make it active. Have a listen to it, then press on the name of the second Snapshot and evaluate the tones. You can take as many snapshots as you want to compare the tones quickly.
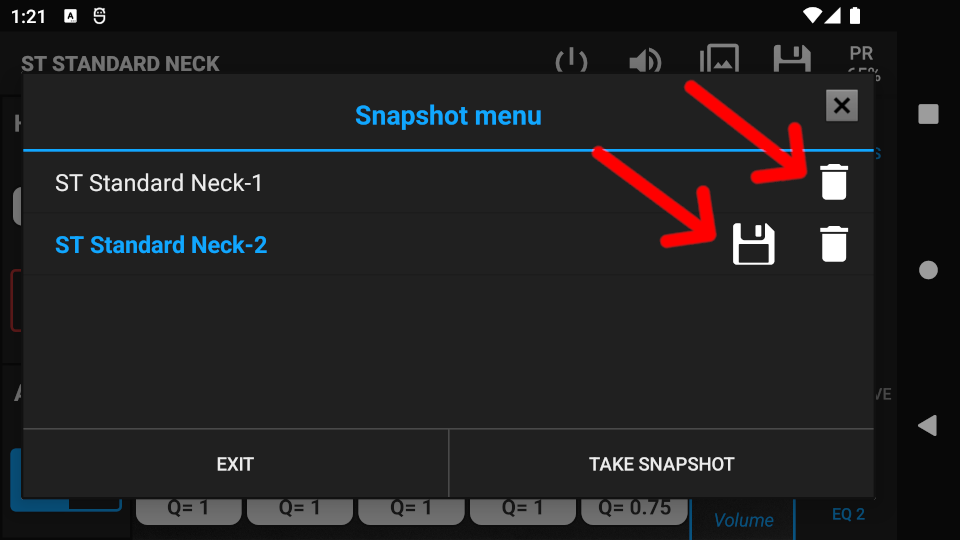
After evaluation, you can choose from the following options:
- Press Exit and use the active Snapshot for further editing.
- Press the Save icon next to the active snapshot and save it as a new preset. After saving, you can continue with editing.
- Press the trash icon to delete the snapshot from the list.