Step 1. Start editing a preset. More info: Preset editing (assigned) or Preset editing (unassigned)
Step 2. Press the EQ 1 or the EQ 2 icon on your signal chain to enter one of the Equalizer screens.
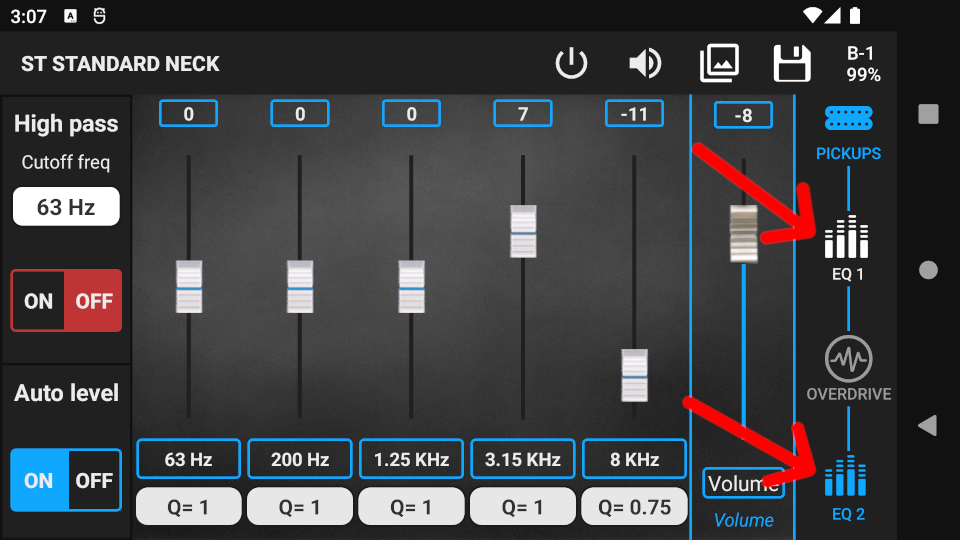
- EQ 1 is a 5-band parametric EQ. In the signal chain it is located before the Overdrive.
- EQ 2 consists of a 3-band parametric EQ and a special wide band parametric filter. In the signal chain, EQ 2 is located after the Overdrive.
- On the left side of both EQ screens, there is a parametric High-pass filter. In the signal chain, it is located before the Overdrive regardless of the screen you are using.
Using the Equalizers
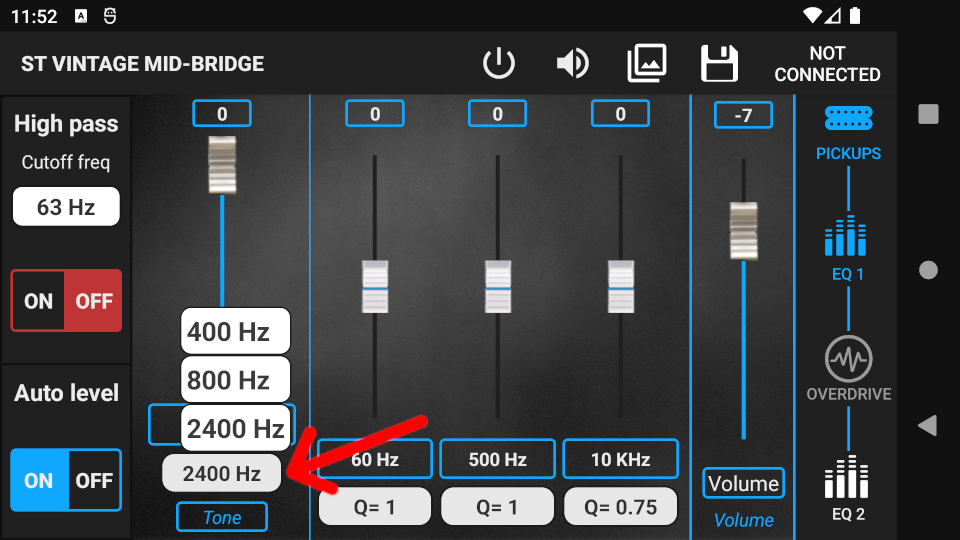
Step 1. Press the frequency selector button (blue strokes) to change the center frequency of a band. Every band has 4 selectable frequencies. Press and hold the button to bring up the selector menu, where you can listen to the selected frequency.

Step 2. Use the fader above the selector to set the gain of the band. Gain can be set in a range of ±15 dB in 1 dB steps. By changing the gain, the volume of the frequencies associated with the band can be increased or decreased relative to other frequencies. To fine adjust fader levels, press the level value (blue strokes) above a fader.
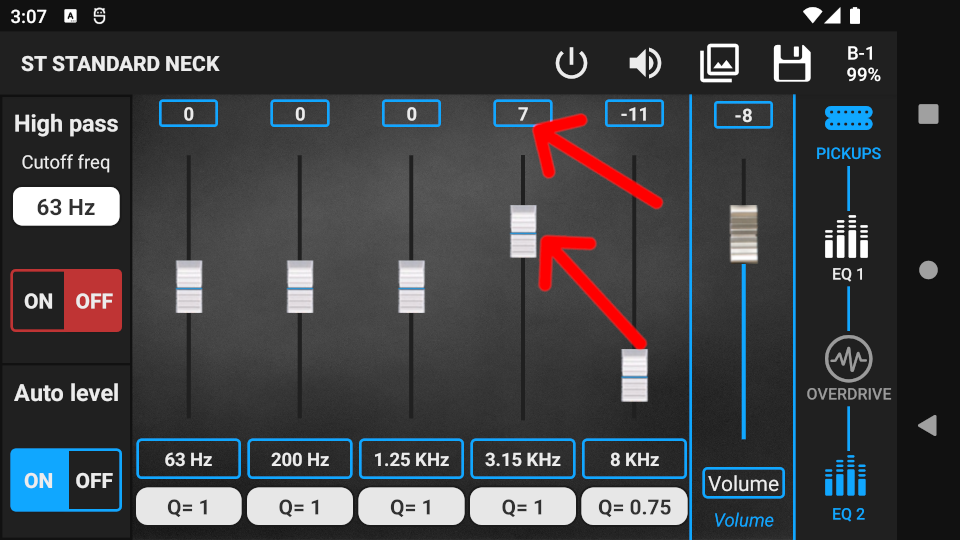
Step 3. Use the Q selector below the frequency selector to set the Q factor (bandwidth) of the band. Every band has 4 Q values. The higher the Q value, the narrower the bandwidth. When the bandwidth is narrow, the band will have less affect on other frequencies around the center. frequency.
Example: A band has +10 dB gain and 630 Hz center freq. By setting the Q to 2 the band will only work in the frequency range of 200 Hz – 3 Khz. By setting the Q to 0.75 the band will work in the frequency range of 60 Hz – 12 Khz.

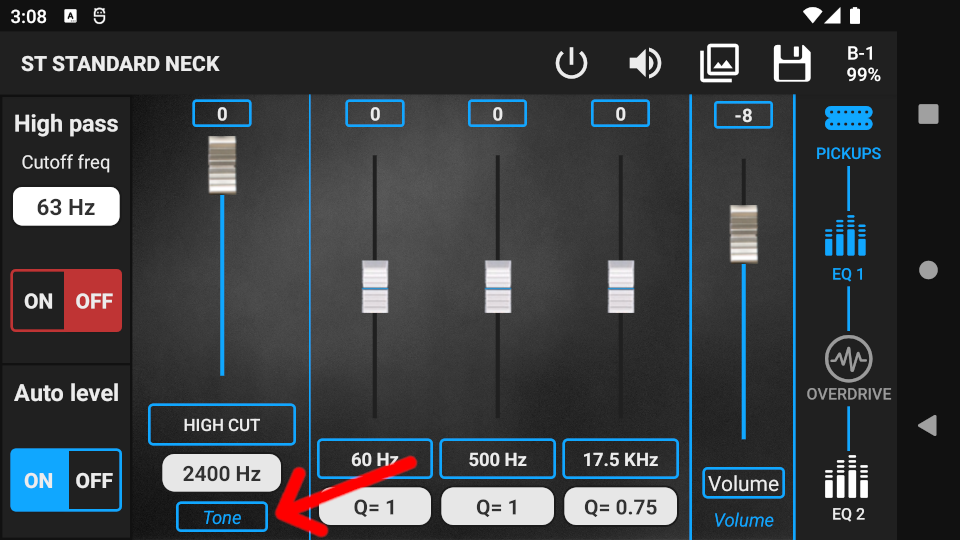
Using the special wide band filter in EQ 2
The wide band filter in EQ 2 can be used to cut high or mid frequencies, while affecting the whole frequency spectrum. This filter can be assigned to a potentiometer; this way the potentiometer can be used as a tone knob.
Step 1. Press the button (blue strokes) below the fader to change between High Cut or Mid Cut mode.

Step 2. Choose between 3 cutoff frequencies by using the selector below the mode selector button.
Step 3. Use the fader to cut the mid/high. It can cut a maximum of 15 dB in 1 dB steps.
Step 4. Press the button below the cutoff selector to assign the fader to a potentiometer. The actual value of the fader will be the maximum value of the potentiometer.
Warning! Potentiometers are not working in PRESET EDITING, only in GUITAR EDITING.
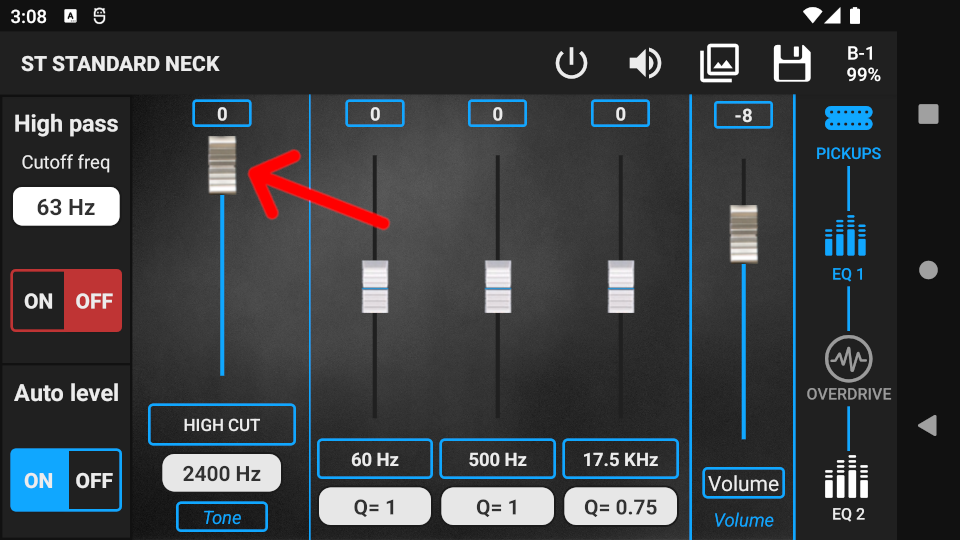
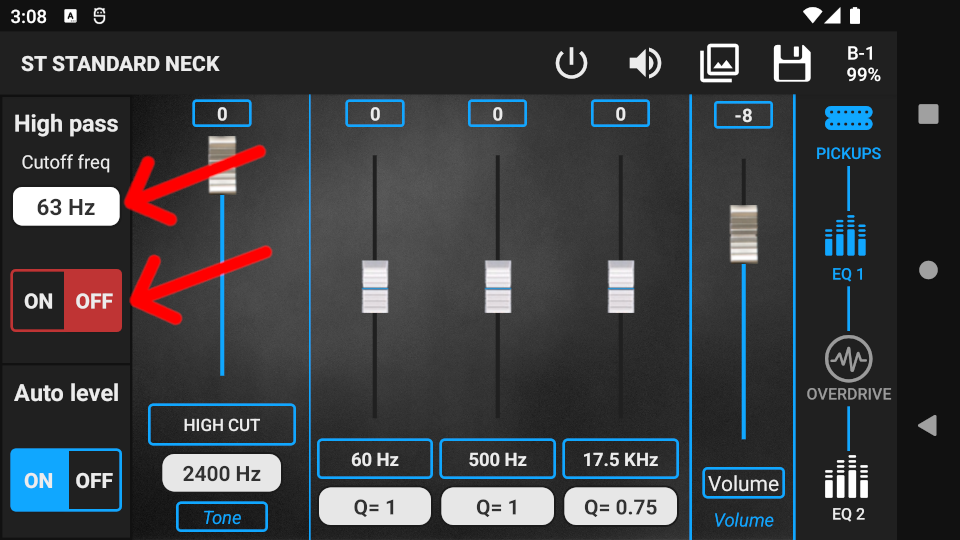
Using the High Pass Filter
The High pass filter is used to cut the bass frequencies of the guitar. In practice it does the same thing as a treble booster, which is very useful when playing in a band since it cleans up the sound as the guitar gives more space to the bass section.
Step 1. Use the Cutoff freq selector to change the cutoff frequency of the filter. Higher cutoff freq cuts more bass.
Step 2. Press the On/Off switch under the selector to turn the filter on/off.
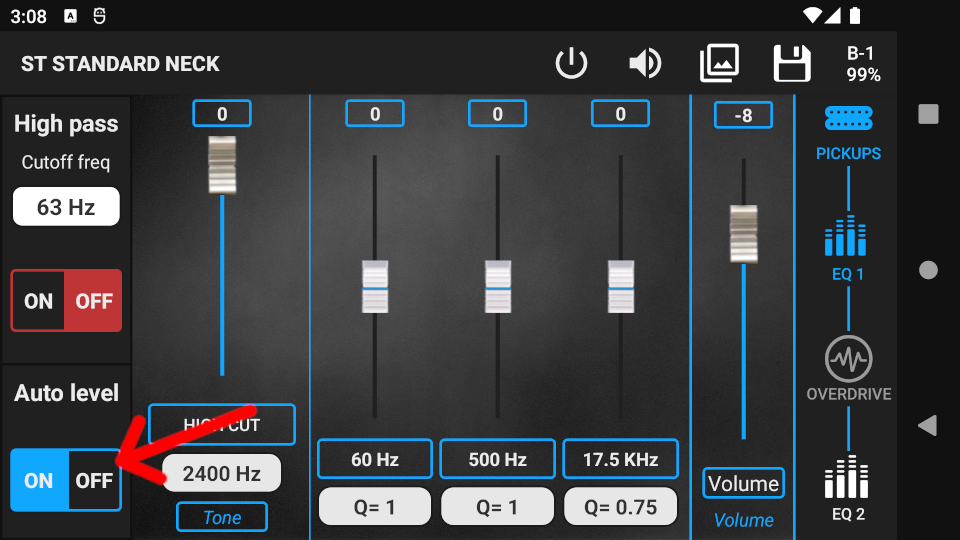
Auto Level Switch
Press the Auto Level ON button to turn on the EQs automatic level tool. This tool automatically keeps the volume at the same level while the EQ parameters are being changed. Using it is highly recommended as it is easier to hear the differences between tones at the same volume level. The human ear perceives the same tone differently depending on volume.
While editing, you have the option to use the Snapshots tool to find the perfect tone. Using Snapshots helps you to compare different preset settings (tones) quickly and easily. More info: Snapshots
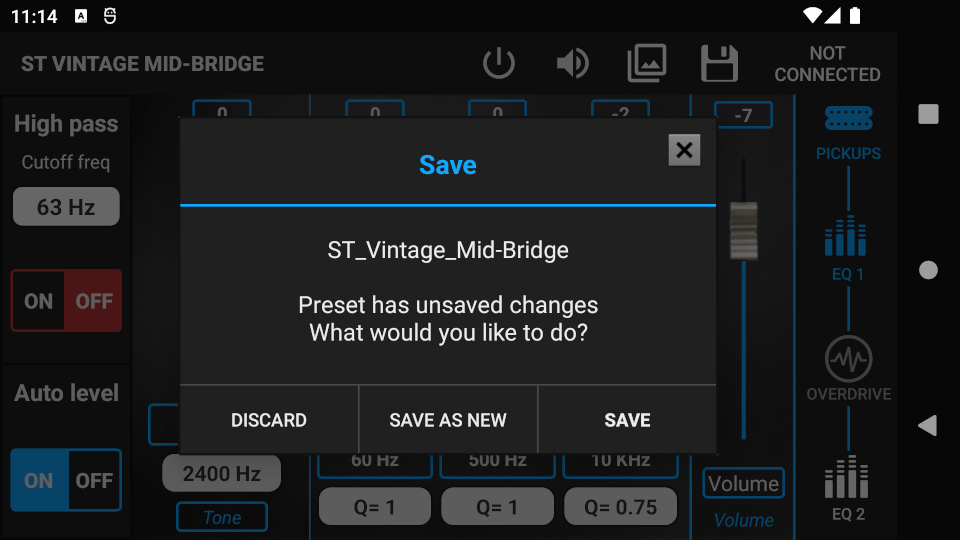
When you are finished with editing, press the save icon to bring up the Save pop-up window. You can save changes either to the current preset, or to a new preset and leave the current preset untouched.

To discard all changes, press the back button on your device, then press the DISCARD button in the Save pop-up window.