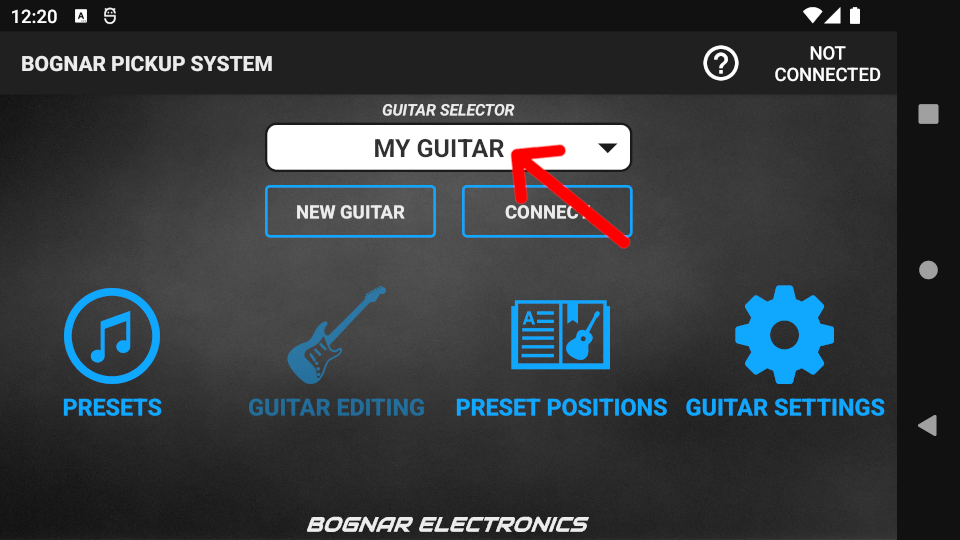
Step 1. Press the GUITAR SELECTOR box on the start screen and select the guitar you wish to use.
Step 2. Enter Programming Mode by turning the MAIN switch on your guitar to the “PR” position. In Programming Mode the LED flashes red repeatedly, indicating that the guitar is ready for connection.
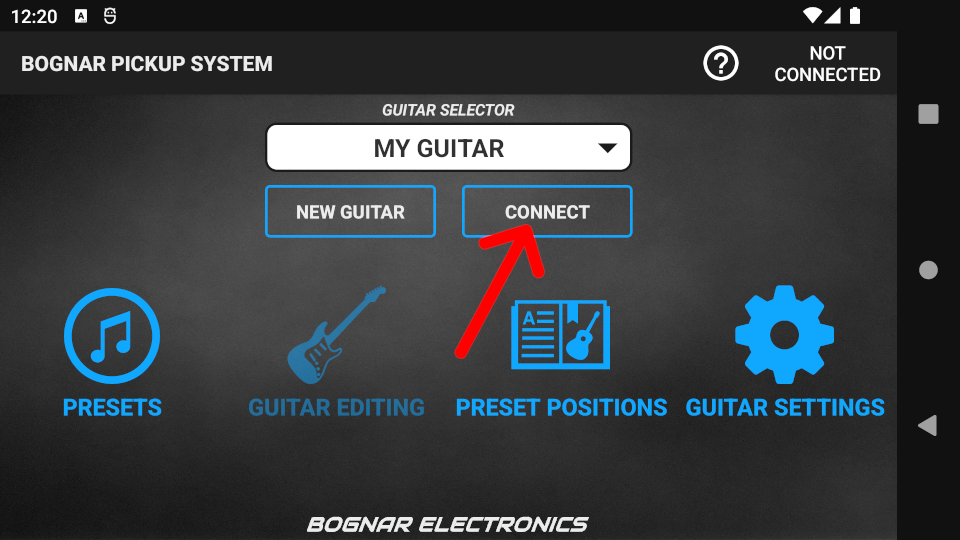
Step 3. Press the CONNECT button.
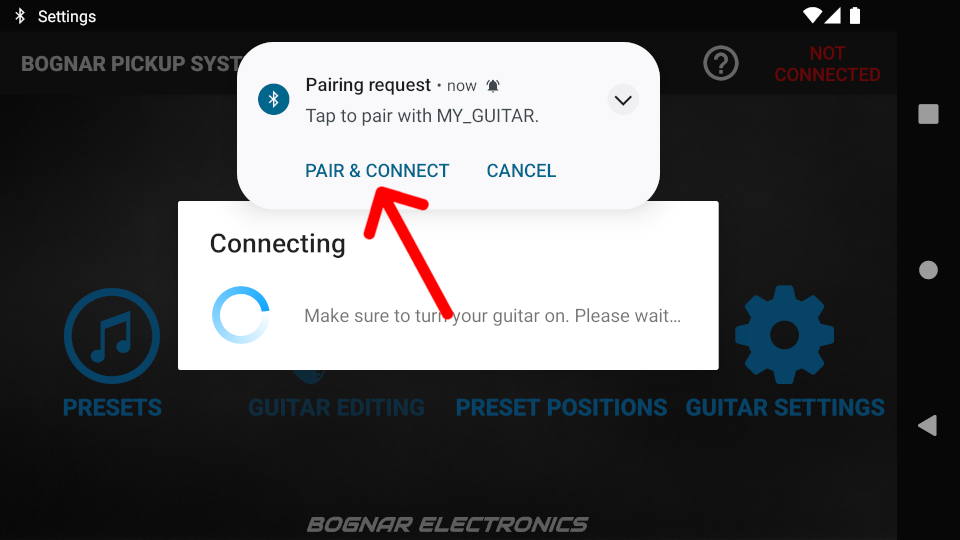
Step 4. If your guitar has not been previously paired with the app, Bluetooth® pairing will begin. Bluetooth® pairing is indicated by a sound and a pop-up notification.
- If the notification did not appear automatically, swipe down on your screen for the notification, and press on it.
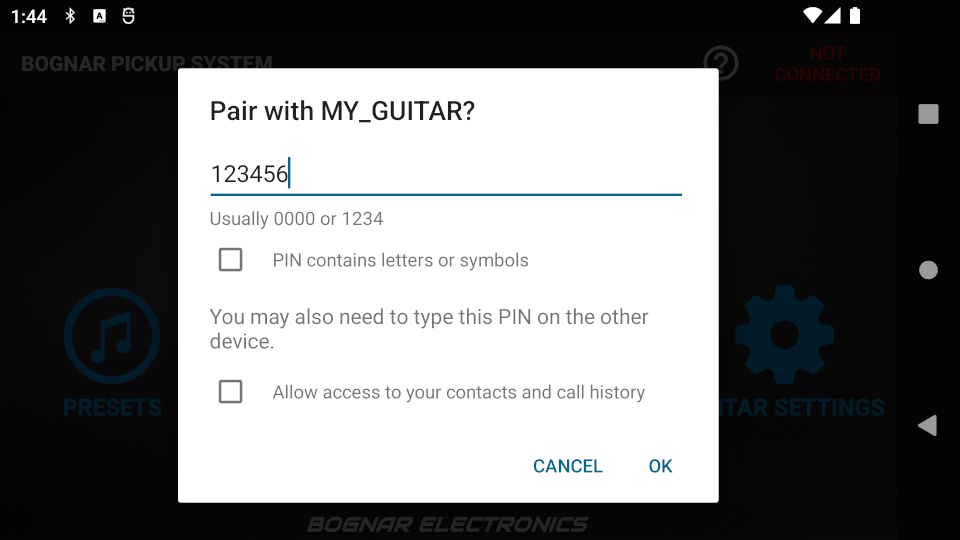
Step 5. Type in the default Pin (123456) in the pop-up window, then press OK. The app will connect to the guitar.
Upon successful connection the guitar LED flashes blue repeatedly, and synchronization with the guitar begins. During the synchronization process, the factory presets are loaded onto the guitar. This may take 15-45 seconds.
- If the LED still flashes red, press CONNECT again and repeat the process. If pairing was successful earlier, no pairing request will appear next time.
Synchronization
Every successful connection starts a synchronization process. Synchronization ensures that data in the guitar and the app are the same. If data are different (e.g. the guitar had previously been programmed by a different device), the Synchronization screen will appear. On the Synchronization screen you must decide whether to use app data or guitar data.
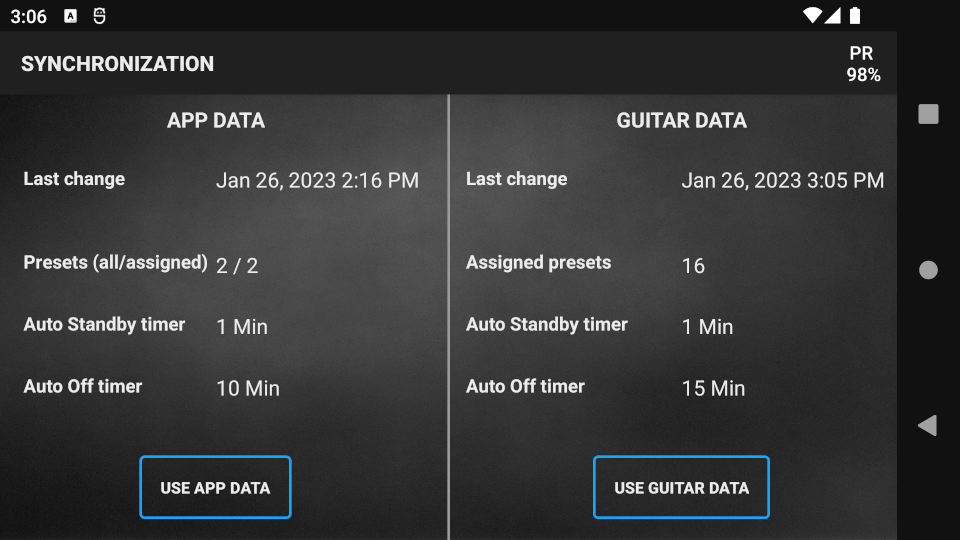
When one data set is selected, you can save the other data set as a new guitar entry on the next screen. This new guitar is still associated with the physical guitar, but contains the unused data. The unused data can be loaded by connecting to this guitar.
- If the guitar or the app is empty, data from the other device will automatically be loaded onto the empty device.